With winter’s chill still lingering, your ears may be ringing with the echo of “I’m bored!” from the kids. Fill these pre-spring days by encouraging your kids to try a new medium – like pastels.
Some parents avoid this medium, which seems daunting, but is actually easy to use and fun for kids (and adults!) to experiment with. The first thing to note is that pastels, like many other forms of art, will create a mess, so dress kids appropriately and choose an ideal location for creating. Consider covering tabletops with paper and be sure to have wet wipes handy.
There are two types of pastels, each with pros and cons, and each functioning differently. Oil pastels are like crayons, but the pigment is bound together with oil instead of wax like a crayon. Oil pastels offer bold color and are easy to use, but these pastels don’t blend traditionally. For instance, yellow and blue on top of each other will not create green.
Soft pastels are pure pigment with very little binding agent. They offer bright color and are easy to blend. They are also easier to break, but that’s not a problem. Broken and smaller bits of soft pastels can be used to make different marks, and small hands may find smaller bits easier to use.
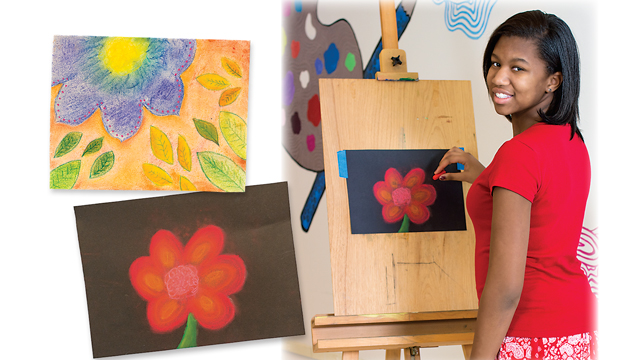
Pastels can be purchased either in sets or as individual colors. A set of twelve is a great way to get started. Later, you may wish to purchase individual pastels, as certain colors will be used more than others. Children can create pastel masterpieces using paper from a sketchbook, copy paper, or even construction paper. Don’t be afraid to use darker color papers, too – pastels on dark backgrounds really pop.
Now that you have your supplies, get ready to make your mark. Try layering different colors from the same color family together, such as a yellow, light green, and dark green. With soft pastels, use your finger, cotton swabs, cotton balls, or a bit of paper towel to lightly blend the colors together. To blend oil pastels, layer light to dark colors, then run over all colors again with the lightest color and watch the layers smooth out.
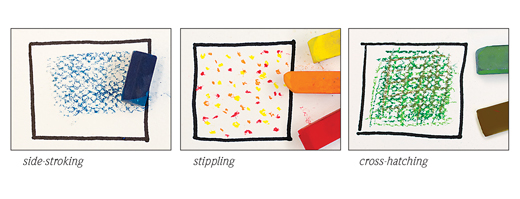
 Other marks to try are side-stroking, stippling, and cross hatching. Side-stroke is simply using the pastel stick on its side to make wider marks. This is where those smaller bits of broken pastel come in handy. Stippling, like pointillism, is making small dot marks. Use at least three colors to create the dots to add depth and texture. Cross-hatching uses criss-cross marks to add shadow and shading to areas of a painting. Use the “rule of three” when layering colors with these marks – three colors are needed to make it stand out.
Painting with pastels, especially soft pastels, will create dust. While it is tempting to blow the dust off the paper, don’t do it. Have newspaper on the side, and tap the pastel dust onto it. Just like chalk dust, if blown, it will float and land on whatever is around it.
Once you get the hang of painting with pastels, mix it up. Try combining pastel painting over a tempera paint background, or outline subject matter in glue to add dimension. Try pastel pencils to draw thinner lines and details. The possibilities are endless!


