
 Art History is Not Linear (VMFA), a commissioned painting by Virginia-born artist Ryan McGinness, draws inspiration for its two hundred symbols from artwork in VMFA’s collection. Follow these steps and create your own screenprinted symbolic exploration of whatever you’d like.
What you need:
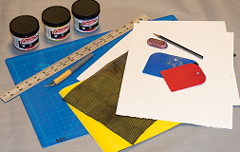
• Foam core, cut into a 5- to 8-in square
• X-acto blade or utility knife
• Screen-print fabric or a substitute like window screen or polyester mesh
• Stapler
• Pencil and paper, ruler
• Contact paper
• Screen printing inks (or acrylic paints)
• Small squeegee
• Material to print on, such as watercolor paper or fabric
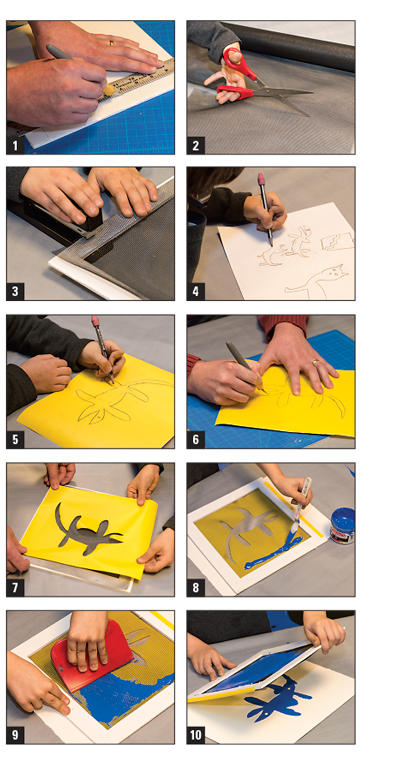
What you do:
1. To create your screen, measure a 1-in border around your foam-core square. Use the X-acto or utility knife to cut out the center of the square, leaving an empty frame.
2. Trim a piece of screen that covers the foam-core frame from edge to edge.
3. Using a stapler, attach the mesh or screen to the frame, keeping the screen as taut as possible.
4. Sketch out your ideas for symbols to represent things from your life: hobbies, favorite games, sports teams, friends, family, pets, crosses, hearts, etc.
5. Keeping the details simple, draw a symbol on contact paper.
6. Cut out your designs from the contact paper. Remember, the areas that you remove will become the colored part of your screen print.
7. Remove the back of the contact paper and adhere it to the flat side of your screen. The image should be near the center of the screen and the contact paper should cover the screen beyond the inside edge of the frame.
8. Turn your screen over. Place the screen on the paper or fabric. Add ink to your screen by applying a narrow band to one of the recessed edges.
9. Using the squeegee, drag the ink over the entire screen. Make sure the ink completely covers your image.
10. Carefully lift up the screen. You have just screen-printed your first image! Add ink if necessary and place the screen where you want your next image.
11. Wash the screen if you want to change colors. Be careful to let images dry before printing on top to avoid smudging. To change the image, simply replace the used contact paper with a different contact paper cutout.
(Adult supervision is recommended when blades or sharp knives are in use.)
